Flutter in-app purchases and subscriptions with purchases_flutter
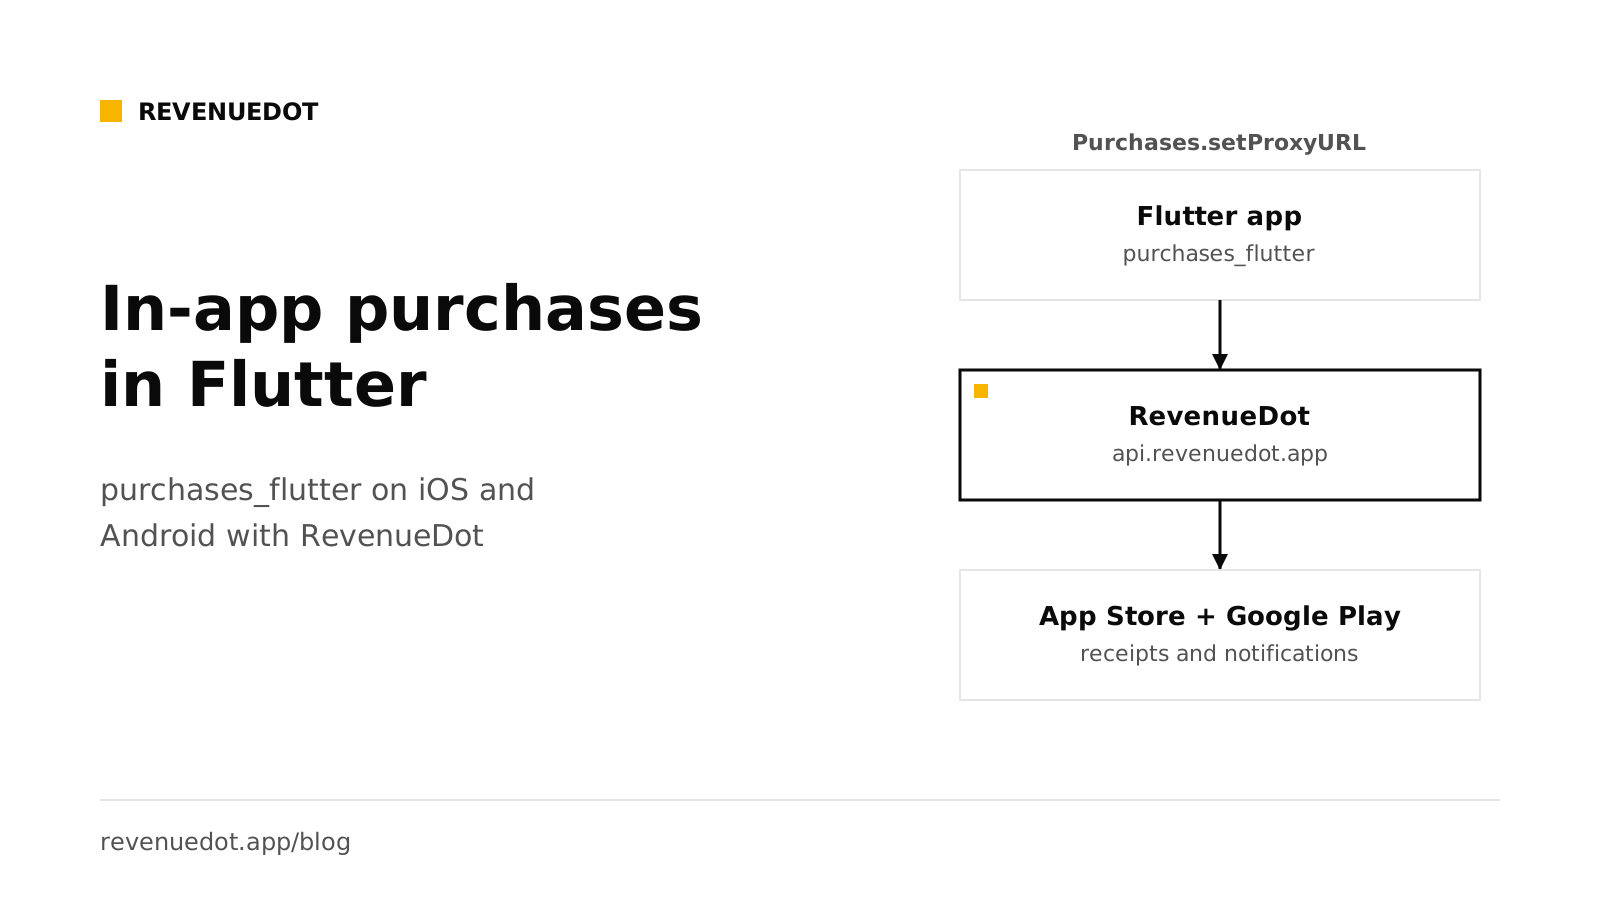
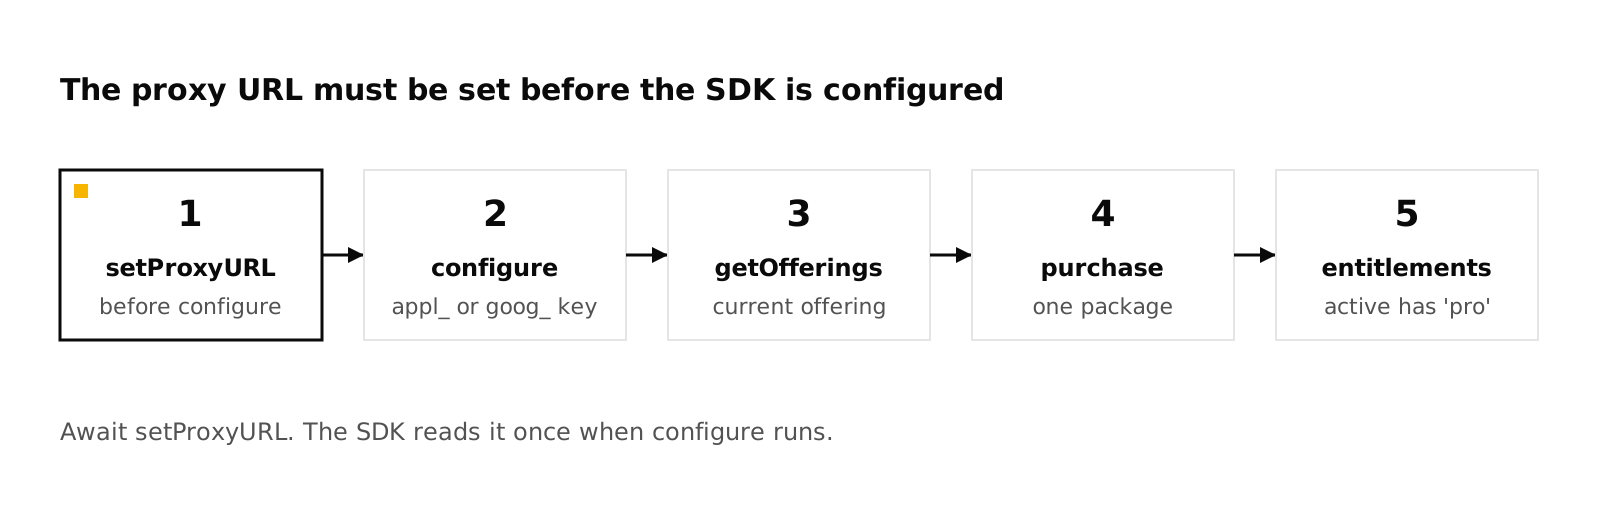
To add in-app purchases to a Flutter app, install purchases_flutter, call await Purchases.setProxyURL('https://api.revenuedot.app') before Purchases.configure, then load offerings, call Purchases.purchase and check customerInfo.entitlements.active. RevenueDot is the backend: it verifies each App Store and Google Play purchase and answers with the customer's entitlements. The same Dart code runs on iOS and Android.
What you need#
- Flutter 3.22 or later. RevenueCat's Flutter installation guide lists it as the minimum, and says an iOS deployment target of 13.0 or higher must be set in
ios/Podfilewhen you use CocoaPods. - An App Store Connect app with a subscription, and a Google Play Console app with a subscription. You can start with one platform.
- A RevenueDot Cloud project. Sign up free.
The steps: create the products, connect the stores, build the catalog, install the package, configure it, build the paywall, test.
Step 1: Create the subscription in each store#
Create the same plan on each platform you ship.
- App Store: in App Store Connect, create a subscription group and an auto-renewable subscription with a Product ID such as
pro_monthly. Apple's help page lists each field. - Google Play: in Play Console, create a subscription with a Product ID, add a base plan with a billing period, set prices, and click Activate. Google's help page explains that hierarchy: subscription, then base plan, then pricing.
Write down both IDs. For Google Play subscriptions, RevenueDot's product ID is subscriptionId:basePlanId, for example pro:monthly.
For step-by-step store screens, see How to add subscriptions to a SwiftUI app and Android with Google Play Billing.
Step 2: Connect the stores to RevenueDot#
In RevenueDot, add one app per store.
| Store | What RevenueDot needs | Guide |
|---|---|---|
| App Store | Bundle ID, an In-App Purchase key (.p8, Key ID, Issuer ID), and the notification URL set as Version 2 in App Store Connect |
App Store |
| Google Play | Package name, a service account JSON key with Play Console access, and a Pub/Sub push subscription for real-time developer notifications | Google Play |
The dashboard checks each credential and shows whether notifications arrive.
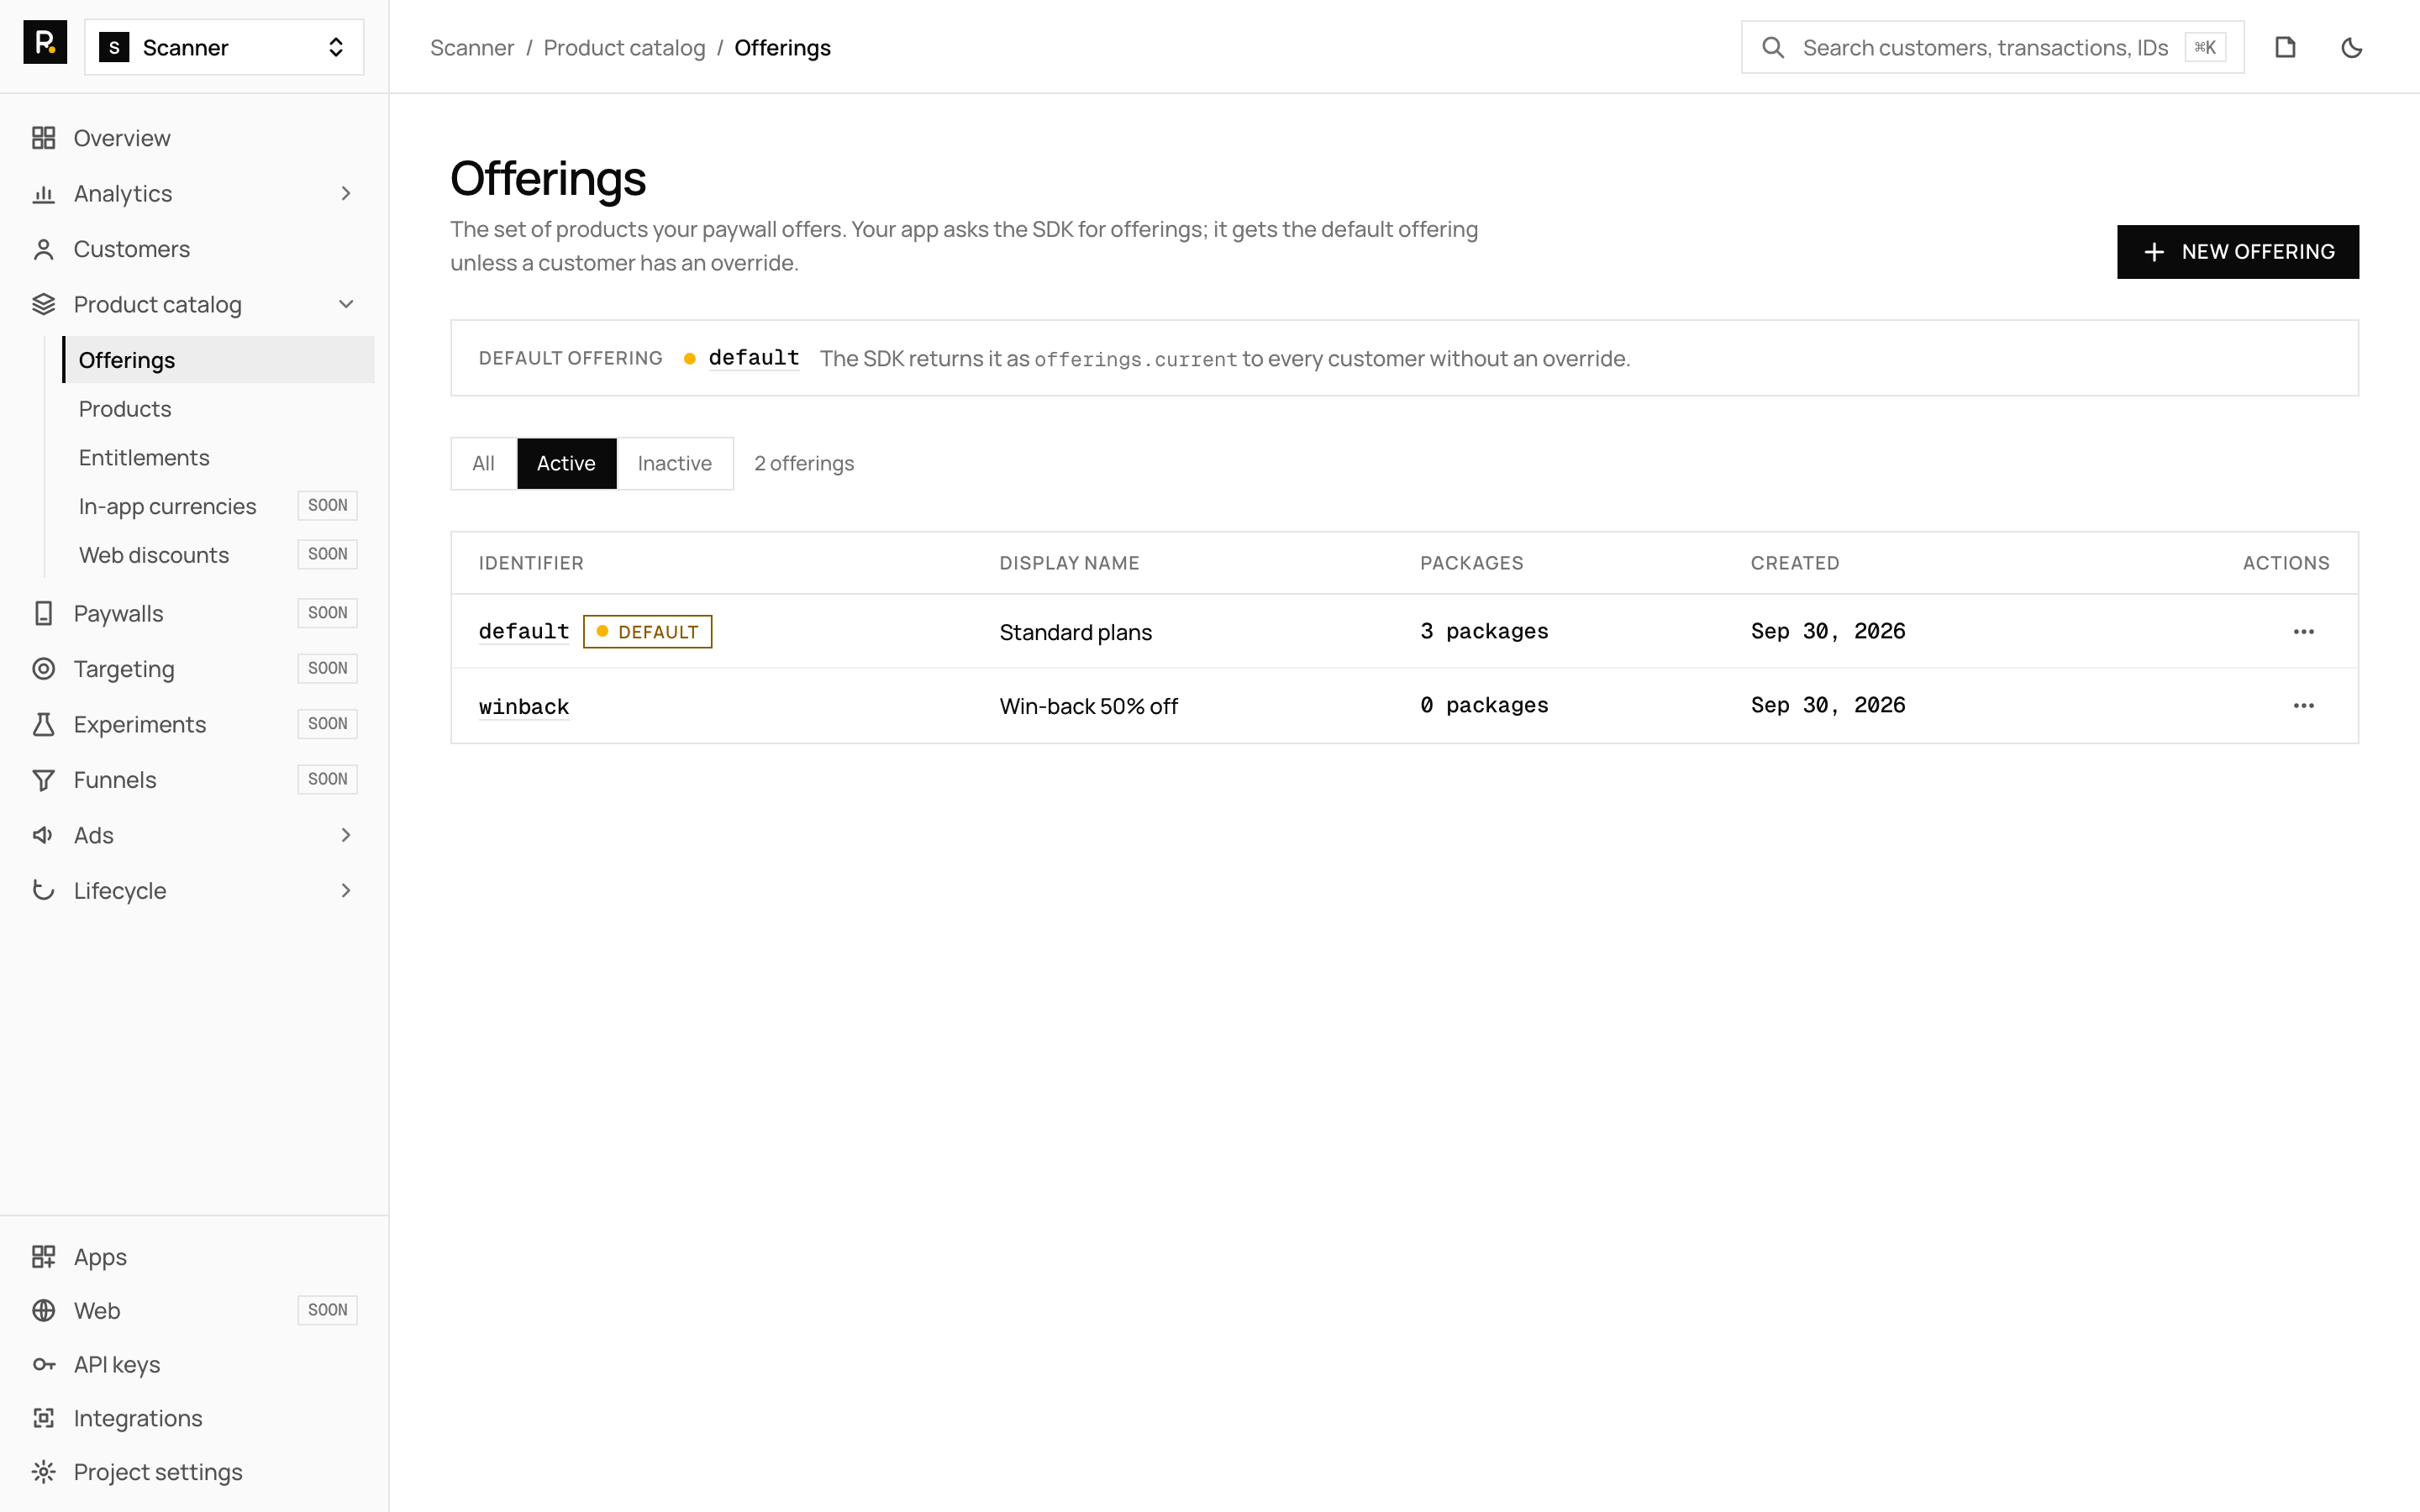
Step 3: Create the product, entitlement and offering#
- Products: add
pro_monthlyto the App Store app andpro:monthlyto the Google Play app. - Entitlements: add
pro. Attach both products to it. - Offerings: create
default, add a$rc_monthlypackage, put both products in it (one per app), and make the offering current.
A package holds one product per app, so one offering serves both platforms. See offerings and packages.
Step 4: Install the package#
flutter pub add purchases_flutterThen confirm the iOS target in ios/Podfile:
platform :ios, '13.0'On Android, RevenueCat says to set the Activity's launchMode to standard or singleTop so that a purchase is not cancelled when the customer must authenticate in another app. Check android/app/src/main/AndroidManifest.xml.
The RevenueDot fork keeps the package name purchases_flutter. It is not published yet, and its patch branch needs native packages that are not published, so use the stock package in proxy mode today.
Step 5: Configure the SDK with the proxy URL#
Await setProxyURL before configure. The stock package defaults entitlementVerificationMode to disabled, which is what RevenueDot needs, so you change nothing else.
import 'dart:io' show Platform;
import 'package:purchases_flutter/purchases_flutter.dart';

Future<void> initPurchases() async {
  // Point the SDK at RevenueDot. Await it before configure.
  await Purchases.setProxyURL('https://api.revenuedot.app');
  await Purchases.configure(
    PurchasesConfiguration(Platform.isIOS ? 'appl_YourKey' : 'goog_YourKey'),
  );
}

Future<void> main() async {
  WidgetsFlutterBinding.ensureInitialized();
  await initPurchases();
  runApp(const MyApp());
}
Never set EntitlementVerificationMode.enforced with the stock package. It checks signatures against RevenueCat's key, so every request would fail. See Trusted Entitlements.
Flutter web: the stock package's web plugin ignores setProxyURL, so web calls still go to RevenueCat. The RevenueDot fork fixes this, but it is not published. Target iOS and Android for now.
Step 6: Build the paywall#
Load the current offering, show its packages, buy, restore and read the entitlement.
import 'package:flutter/material.dart';
import 'package:flutter/services.dart' show PlatformException;
import 'package:purchases_flutter/purchases_flutter.dart';

class PaywallScreen extends StatefulWidget {
  const PaywallScreen({super.key});
  @override
  State<PaywallScreen> createState() => _PaywallScreenState();
}

class _PaywallScreenState extends State<PaywallScreen> {
  List<Package> packages = [];
  bool isPro = false;
  String? error;

  @override
  void initState() {
    super.initState();
    Purchases.addCustomerInfoUpdateListener(_apply);
    _load();
  }

  void _apply(CustomerInfo info) {
    if (!mounted) return;
    setState(() => isPro = info.entitlements.active.containsKey('pro'));
  }

  Future<void> _load() async {
    try {
      final offerings = await Purchases.getOfferings();
      _apply(await Purchases.getCustomerInfo());
      setState(() => packages = offerings.current?.availablePackages ?? []);
    } on PlatformException catch (e) {
      setState(() => error = e.message);
    }
  }

  Future<void> _buy(Package package) async {
    try {
      final result = await Purchases.purchase(PurchaseParams.package(package));
      _apply(result.customerInfo);
    } on PlatformException catch (e) {
      final code = PurchasesErrorHelper.getErrorCode(e);
      if (code != PurchasesErrorCode.purchaseCancelledError) {
        setState(() => error = e.message);
      }
    }
  }

  Future<void> _restore() async => _apply(await Purchases.restorePurchases());

  @override
  Widget build(BuildContext context) {
    if (isPro) return const Center(child: Text('You have Pro'));
    return ListView(padding: const EdgeInsets.all(16), children: [
      for (final p in packages)
        FilledButton(
          onPressed: () => _buy(p),
          child: Text('${p.storeProduct.title}, ${p.storeProduct.priceString}'),
        ),
      TextButton(onPressed: _restore, child: const Text('Restore purchases')),
      if (error != null) Text(error!, style: const TextStyle(color: Colors.red)),
    ]);
  }
}
Purchases.purchasePackage still works but is deprecated in the 10.x line. The PurchaseParams.package form is the current one.
Expected output: the screen lists one button per package. After a sandbox purchase, isPro turns true, and the dashboard shows the customer with an active pro entitlement and an INITIAL_PURCHASE event.
Optional: identify your own users#
Without an app user ID, the SDK starts with an anonymous ID (it begins with $RCAnonymousID:) and keeps it on the device. That is fine for an app with no accounts. If your app has sign-in, call logIn after the customer signs in, so their purchases follow them to a new phone and to your web app.
// After your own sign-in succeeds:
final result = await Purchases.logIn(myUserId);
final isPro = result.customerInfo.entitlements.active.containsKey('pro');

// When the customer signs out:
await Purchases.logOut();
When an anonymous customer who already bought something calls logIn, their purchases move to the identified user. RevenueDot keeps one customer record per app user ID and lists the old anonymous ID as an alias. The rules for who owns a purchase that two accounts both restore are the project's transfer behavior. They are explained in customers and app user IDs and the restore guide.
Use the same user ID on every platform, and never put a secret in it. The ID appears in dashboards, webhooks and logs.
Optional: move an existing RevenueCat app to RevenueDot#
If your Flutter app already ships purchases_flutter with RevenueCat's backend, the change is three lines. Add the proxy URL before configure, keep your current keys if you ran the importer, and call syncPurchases once on the first launch of the update, so subscribers who bought while the app talked to RevenueCat keep access.
await Purchases.setProxyURL('https://api.revenuedot.app');
await Purchases.configure(PurchasesConfiguration(Platform.isIOS ? 'appl_YourKey' : 'goog_YourKey'));
// Once, after this update:
await Purchases.syncPurchases();
Old app versions keep calling RevenueCat until their owners update, so run both systems side by side for a while. The migration post gives the order of steps.
Step 7: Test#
With no store account. Create a Test Store app in RevenueDot, add a product and a Test Store price, and pass its test_ key to configure. The SDK shows a Test Store dialog. Tap Test valid purchase. Test Store keys work only in debug builds, so ship with the appl_ and goog_ keys. For a local server, the iOS simulator reaches your Mac at localhost and the Android emulator at 10.0.2.2.
On iOS. Create a sandbox tester under Users and Access, Sandbox in App Store Connect and sign in with it under Settings, App Store, Sandbox Account. Sandbox subscriptions renew in minutes.
On Android. Add license testers in Play Console under Setup, License testing, publish the app to an internal test track, and install from that track. Test subscriptions renew every few minutes.
Before you ship, run one sandbox purchase on each store and check that it reaches the customer page and your webhooks. See sandbox testing.
Common errors and fixes#
| Symptom | Cause | Fix |
|---|---|---|
| Offerings are empty | Product IDs differ between the store and RevenueDot, or the offering is not current | Match the IDs, make the offering current |
| Web calls reach RevenueCat | The stock web plugin ignores setProxyURL |
Use iOS and Android, or the fork when it is published |
| Every request fails with a signature error | entitlementVerificationMode set to enforced |
Remove it. Disabled is the default |
| Purchase succeeds on Android, entitlement missing | No service account on the Google Play app | Add it. RevenueDot answers 503 (code 7101) until then and the SDK retries |
| iOS build fails after you add the fork | The fork needs unpublished native packages | Use the stock package in proxy mode |
Do it with RevenueDot#
- Create a free account. Cloud is free up to $10,000 in monthly tracked revenue.
- Add your App Store and Google Play apps with their credentials.
- Create the product, the
proentitlement and thedefaultoffering. - Add
await Purchases.setProxyURL('https://api.revenuedot.app')beforeconfigure. - Add a webhook under Integrations, Webhooks so your own backend hears about purchases.
Start free on RevenueDot Cloud
FAQ#
Which Flutter package do I use for subscriptions?#
Use purchases_flutter, the RevenueCat SDK package. It works with RevenueCat's own backend and with RevenueDot when you call Purchases.setProxyURL before configure.
Does purchases_flutter work with a backend other than RevenueCat?#
Yes, through the proxy URL. RevenueDot speaks the same API, so the SDK talks to https://api.revenuedot.app or to your own server and your Dart code does not change.
Do I need the in_app_purchase package as well?#
No. purchases_flutter wraps StoreKit and Google Play Billing for you, and it handles verification through the backend. Use one purchase package, not two.
Can I use one entitlement for iOS and Android?#
Yes. Attach the App Store product and the Google Play product to the same entitlement, and put both in one package. Your app checks entitlements.active['pro'] on both platforms.
Does it work on Flutter web?#
Not in proxy mode with the stock package, because its web plugin ignores the proxy URL. RevenueDot's fork fixes it, but the fork is not published yet.
About RevenueDot. RevenueDot is an open-source (AGPL-3.0) backend for in-app purchases and subscriptions that works with the RevenueCat SDK. Start free on RevenueDot Cloud, free up to $10,000 in monthly tracked revenue, or self-host it with Docker and Postgres. Point the SDK's proxy URL at RevenueDot and keep your app code, your offerings and your customers. Read the quickstart or the code on GitHub.